
To clean a bagless vacuum cleaner bed bugs, start by emptying the canister into a sealed trash bag and washing it with hot soapy water. Then, use a brush to remove any bed bugs or debris from the filter and wash it as well.
Finally, thoroughly clean the vacuum’s attachments and brush roll to ensure all traces of bed bugs are removed. Introduce your article by mentioning the problem many homeowners face with bed bugs and how they can easily infest household items like vacuum cleaners.
Explain the importance of proper cleaning techniques to prevent further infestation and provide a step-by-step guide on how to clean a bagless vacuum cleaner bed bugs. Emphasize the significance of emptying and washing the canister, cleaning the filter, and disinfecting the attachments. Mention the importance of being thorough in order to eliminate all signs of bed bugs and prevent their spread throughout the home. Finally, let readers know that following these cleaning steps regularly will help maintain a bed bug-free environment.
What Are Bagless Vacuum Cleaners?
Bagless vacuum cleaners are a convenient option for cleaning bed bugs, as they don’t require bags to capture the debris. Cleaning a bagless vacuum cleaner involves emptying the dirt canister, washing the filters, and thoroughly sanitizing the vacuum to eliminate any traces of bed bugs.
Definition And Explanation Of Bagless Vacuum Cleaners
Bagless vacuum cleaners are innovative cleaning devices that offer a convenient and efficient way to remove dust, dirt, and debris from your home. Unlike their traditional counterparts, bagless vacuum cleaners do not require disposable bags to collect the dirt. Instead, they use advanced filtration systems to capture and store the debris in a compartment within the cleaner itself.
This makes bagless vacuum cleaners a popular choice among homeowners who value cost-effectiveness, ease of use, and sustainability.
Brief Explanation Of Their Mechanism And Advantages
- Cyclonic Technology: Bagless vacuum cleaners utilize cyclonic technology, which creates a powerful vortex that separates the dirt from the air. This allows the dirt particles to be trapped in the collection chamber while the clean air is released back into the room.
- Transparent Collection Chamber: One of the advantages of bagless vacuum cleaners is the transparent collection chamber that allows you to easily monitor the amount of dirt and debris accumulated. This enables you to know when it’s time to empty and clean the chamber.
- Cost Savings: With bagless vacuum cleaners, you eliminate the need to purchase disposable bags, saving you money in the long run. This also reduces waste and contributes to environmental sustainability.
- Easy Maintenance: Bagless vacuum cleaners require minimal maintenance compared to traditional vacuum cleaners. Their detachable components can be easily cleaned and reassembled, ensuring optimal performance and longevity.
- Improved Filtration: Bagless vacuum cleaners often come equipped with high-efficiency filters that effectively remove allergens, dust mites, and other microscopic particles from the air. This is particularly beneficial for individuals with allergies or respiratory conditions.
- Versatility: Bagless vacuum cleaners offer a wide range of models and designs, catering to different cleaning needs and preferences. Whether you have hardwood floors, carpets, or upholstery, there is a bagless vacuum cleaner suitable for your specific requirements.
Bagless vacuum cleaners provide a modern and efficient cleaning solution for your home. Their mechanism and advantages make them a popular choice among homeowners, offering cost savings, easy maintenance, and improved air filtration.

Credit: homesclubs.com
The Problem Of Bed Bugs In Bagless Vacuum Cleaners
Bed bugs can be a common problem in bagless vacuum cleaners. To clean them effectively, follow these steps: empty the canister, remove filters and wash or replace them, use a stiff brush to clean the brush roll, and vacuum all crevices thoroughly.
Additionally, consider using a steam cleaner to kill any remaining bed bugs.
If you own a bagless vacuum cleaner, you may be unaware of a hidden menace lurking within its confines – bed bugs. While bagless vacuums offer convenience by eliminating the need for bags, they can create a unique challenge when it comes to tackling bed bug infestations.
Bed bugs are not only elusive pests, but they can also be incredibly difficult to eliminate completely. In this section, we will explore the issue of bed bugs in bagless vacuum cleaners and the reasons why they can pose a problematic and stubborn plague to deal with.
Why Bed Bugs Can Be Problematic And Difficult To Get Rid Of:
- Resilient parasites: Bed bugs are resilient creatures that can withstand extreme temperatures and go without feeding for extended periods. This makes them highly adaptable and difficult to eliminate completely.
- Rapid reproduction: Bed bugs are notorious for their quick reproductive cycles. A single female bed bug can lay hundreds of eggs in her lifetime, leading to rapid infestations that can quickly spiral out of control.
- Stealthy nature: Bed bugs are experts in hiding and can squeeze into tiny cracks and crevices, making them challenging to detect and exterminate. Their small size enables them to remain unnoticed even in unlikely places.
- Resistance to common pesticides: Over time, bed bugs have developed resistance to many types of pesticides, making traditional pest control methods less effective. This resistance further complicates the eradication process and requires alternative approaches.
- Reinfection risk: Even if you manage to remove bed bugs from your bagless vacuum cleaner, there is always a risk of reinfestation. Bed bugs can easily hitch a ride from other infested areas, such as furniture or clothing, and find their way back into your vacuum cleaner.
Considering the perseverance and adaptability of bed bugs, it is crucial to know how to properly clean your bagless vacuum cleaner to reduce the risk of reinfestation. In the following sections, we will explore effective cleaning techniques that can help eliminate and prevent bed bug infestations in bagless vacuum cleaners.
Step 1: Disassembling The Vacuum Cleaner
To clean a bagless vacuum cleaner bed bugs effectively, start by disassembling the vacuum cleaner. This step allows you to access all the nooks and crannies, enabling a thorough cleaning to get rid of those pesky bed bugs.
Properly Dismantling The Different Components Of The Vacuum Cleaner
When it comes to cleaning a bagless vacuum cleaner infected with bed bugs, it is essential to disassemble the machine properly. This will allow you to clean each component thoroughly and ensure that no bed bug larvae or eggs are left behind.
Follow these steps to dismantle your vacuum cleaner safely and effectively:
- Start by unplugging the vacuum cleaner from the power source to prevent any potential accidents.
- Remove the dustbin or canister from the vacuum cleaner. Empty its contents into a garbage bag and seal it tightly to prevent bed bugs from escaping.
- Check if your vacuum cleaner has a detachable hose. If it does, carefully remove it from the machine.
- Take a close look at the vacuum cleaner’s brush roll or beater bar. Depending on the model, you may need to unscrew it or release clips to detach it from the vacuum.
- In some cases, the filters may be built into the vacuum cleaner’s canister. If this is the case, check your user manual to understand how to remove them. Alternatively, if the filters are separate components, locate them and remove them according to manufacturer instructions.
- If your vacuum cleaner has any additional attachments or accessories, detach them as well. These may include crevice tools, upholstery brushes, or extension wands.
- It is crucial to clean each disassembled component separately. Refer to the manufacturer’s instructions for cleaning recommendations specific to each part of the vacuum cleaner.
- For fabric attachments, such as upholstery brushes, it is advisable to wash them in hot water or use a steam cleaner to kill any bed bugs or their eggs.
- Take extra caution while handling the brush roll or beater bar, as these components may contain entangled hairs, debris, or bed bugs. Use gloves and a cleaning brush to remove any obstructions.
- Once all the parts are thoroughly cleaned and dried, you can reassemble the vacuum cleaner by following these steps in reverse order.
By properly dismantling the vacuum cleaner, you can ensure that every component is cleaned and free from bed bugs. This step is vital in effectively eliminating an infestation and preventing the further spread of these pests. Remember to take safety precautions while disassembling the machine, and always refer to the manufacturer’s instructions for guidance.
Step 2: Cleaning The Dust Container
To properly clean a bagless vacuum cleaner bed bugs, the second step is to clean the dust container. Empty and wash the container thoroughly, ensuring all debris and bugs are removed. This helps maintain the hygiene of your vacuum and prevents any further infestations.
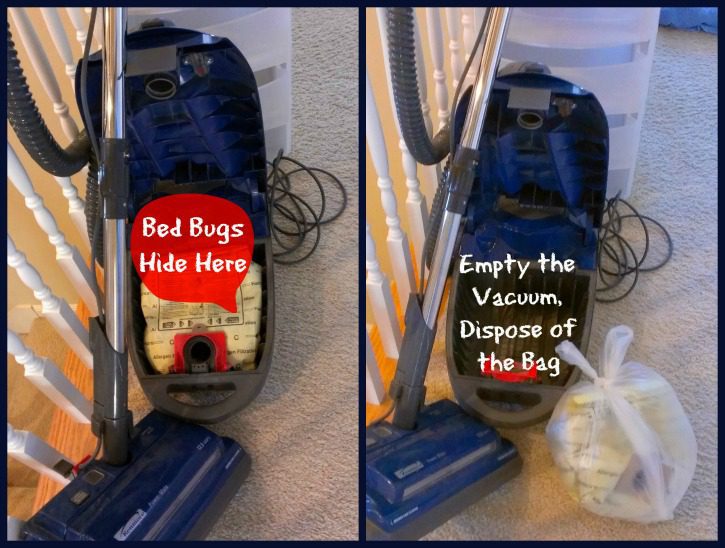
The dust container in a bagless vacuum cleaner is an essential part to clean thoroughly, especially when dealing with bed bugs. To ensure effective removal of bed bugs and prevent a further infestation, it’s crucial to empty the dust container and dispose of the contents properly.
Additionally, thoroughly cleaning the dust container helps eliminate any residual bed bugs and keeps your vacuum cleaner functioning optimally. Follow these steps to clean the dust container effectively:
Emptying The Dust Container And Disposing Of The Contents Properly:
- Carefully remove the dust container from the vacuum cleaner.
- Find a suitable outdoor location away from your home to empty the contents. This prevents any potential bed bugs from reinfesting your living area.
- Open the dust container and carefully empty its contents into a trash bag or sealed container.
- Seal the trash bag or container immediately to prevent any bed bugs from escaping.
- Double bagging the trash can provide an extra layer of protection.
- Dispose of the sealed trash bag or container in an outdoor garbage receptacle, away from your home.
Thoroughly Cleaning The Dust Container To Remove Any Residual Bed Bugs:
- Use gloves to handle the dust container to avoid any direct contact with the contents.
- Wash the dust container with hot soapy water. Ensure all the surfaces, nooks, and crannies are thoroughly cleaned using a brush or sponge.
- Rinse the dust container with clean water to remove all the soap residue.
- Dry the dust container completely before reassembling it back into the vacuum cleaner.
- Once dry, reattach the dust container to the vacuum cleaner securely.
By following these steps, you can effectively empty the dust container, dispose of the contents properly, and thoroughly clean the container to eliminate any residual bed bugs. Taking these precautions will help maintain a clean and bug-free environment in your home.
Step 3: Cleaning The Filters
To clean the filters of a bagless vacuum cleaner infested with bed bugs, follow these steps: 1. Remove the filters and tap them against a hard surface to loosen and remove debris. 2. Rinse the filters under running water, ensuring all dirt is washed away.
Identifying And Locating The Different Filters In The Vacuum Cleaner
When it comes to cleaning a bagless vacuum cleaner infested with bed bugs, it is essential to be thorough in order to eliminate these pests effectively. Step 3 involves cleaning the filters in your vacuum cleaner. Identifying and locating the different filters is the first step towards keeping your vacuum in optimal condition.
Here’s what you need to know:
- Pre-Motor Filter: This filter is usually located near the base of the vacuum, just before the motor. It is designed to trap larger debris to prevent it from entering the motor and causing damage. Identifying and maintaining this filter is crucial for the overall performance of your vacuum cleaner.
- Post-Motor Filter: The post-motor filter is positioned after the motor and is responsible for preventing any fine dust or particles from being expelled back into the air. It aids in maintaining good indoor air quality and should be regularly cleaned or replaced.
- HEPA Filter: Some bagless vacuum cleaners are equipped with HEPA filters, which have the ability to capture smaller particles like allergens and bed bug remnants. HEPA filters are often found near the exhaust port of the vacuum and play a vital role in ensuring that the cleaned air is free from potentially harmful particles.
Detailed Instructions On Cleaning And Maintaining Each Type Of Filter
Now that you know where to locate the different filters in your bagless vacuum cleaner, it’s time to understand the proper cleaning and maintenance techniques for each one. Follow these steps to keep your filters in top condition:
- Pre-Motor Filter:
- Remove the filter according to the manufacturer’s instructions.
- Gently tap the filter over a trash bin to dislodge any loose debris.
- Rinse the filter under running water to remove stubborn dirt and dust.
- Allow the filter to air dry completely before reinserting it into the vacuum cleaner.
- Note: Some pre-motor filters are not washable and may need to be replaced. Refer to the manufacturer’s guidelines for more information.
- Post-Motor Filter:
- Check if your vacuum cleaner’s post-motor filter is washable or replaceable. If it is washable:
- Remove the filter as per the manufacturer’s instructions.
- Rinse the filter under running water, gently squeezing and massaging it to dislodge trapped dirt.
- Avoid using any cleaning solutions or harsh chemicals.
- Allow the filter to air dry completely before reinstalling it.
- If the post-motor filter is not washable, replace it with a new one based on the manufacturer’s recommendations.
- HEPA Filter:
- Check if your vacuum cleaner has a washable or replaceable HEPA filter.
- If it is washable:
- Remove the HEPA filter carefully.
- Rinse it gently under running water, avoiding any excessive force.
- Allow the filter to air dry completely before putting it back into the vacuum cleaner.
- If the HEPA filter is not washable, it will likely need to be replaced. Refer to the manufacturer’s instructions for the correct replacement filter.
Remember to consult your vacuum cleaner’s user manual for specific instructions on maintaining and cleaning the filters. Keeping your filters clean and in good condition will ensure that your bagless vacuum cleaner effectively removes bed bugs and maintains its cleaning performance.
Step 4: Cleaning The Attachments
To clean the attachments of your bagless vacuum cleaner bed bugs, start by removing them from the vacuum itself. Use a damp cloth or brush to gently clean the attachments, focusing on removing any dirt, debris, or bed bugs. Make sure to thoroughly dry the attachments before reattaching them to the vacuum.
Cleaning The Various Attachments And Accessories Of The Vacuum Cleaner:
To ensure a thorough cleaning of your bagless vacuum cleaner, it’s essential to clean the attachments as well. These accessories often come into direct contact with the dirty surfaces and can accumulate debris or even bed bugs over time. Follow these steps to effectively clean the attachments and keep your vacuum cleaner in top condition:
- Brush attachment: This attachment is used to tackle surfaces like upholstery and curtains. Start by removing any visible debris or dust from the brush bristles. Use a small brush or toothbrush to loosen any stubborn debris stuck between the bristles. Wipe it with a damp cloth to remove any remaining dirt or stains.
- Crevice tool: The crevice tool is designed to reach narrow and hard-to-reach areas, such as corners and crevices. Inspect the tool for any debris or bed bugs that might be stuck inside. Use a small brush or toothpick to dislodge any dirt or bugs. Afterwards, wipe it clean with a damp cloth.
- Upholstery attachment: This attachment is ideal for cleaning delicate surfaces like sofas and chairs. Begin by removing any visible debris or hairs from the attachment using your hands or a small brush. If necessary, vacuum the attachment itself to remove finer particles. Additionally, wipe it with a damp cloth to ensure a thorough clean.
- Extension wand: The extension wand allows you to clean those high or hard-to-reach places. Start by inspecting the wand for any visible dirt or debris. If needed, use a damp cloth to wipe it clean. Pay close attention to the connection points where the wand attaches to other accessories or the main vacuum body, as these areas are prone to accumulating debris.
- Dusting brush: The dusting brush is perfect for cleaning surfaces like shelves, blinds, and lampshades. Begin by gently tapping the brush to remove any loose dust or debris. Then, use a damp cloth to wipe the bristles clean. For stubborn debris, a small brush or toothbrush can be used to dislodge the particles.
- Pet-hair attachment: If you have pets, this attachment is a lifesaver for removing pet hair from furniture and carpets. Start by manually removing any visible pet hair from the attachment. Use your hands or a brush to dislodge any trapped hairs. Finish off by wiping the attachment with a damp cloth to eliminate any remaining debris or odors.
Remember, keeping the attachments clean is just as important as maintaining the vacuum cleaner itself. By regularly cleaning these accessories, you not only ensure optimal performance but also prevent the transfer of dirt, debris, and potentially bed bugs from one surface to another.
Step 5: Cleaning The Vacuum Hose And Brush Roll
When it’s time to clean your bagless vacuum cleaner from bed bugs, don’t forget to thoroughly clean the vacuum hose and brush roll. By following step 5 of the cleaning process, you can ensure that these components are free from any pests or debris, allowing your vacuum to perform at its best.
Properly Cleaning The Vacuum Hose To Eliminate Any Bed Bugs Or Debris:
To effectively clean a bagless vacuum cleaner and eliminate any bed bugs or debris, it is crucial to pay attention to the vacuum hose and brush roll. Follow these steps to ensure a thorough cleaning process:
- Remove the vacuum hose from the main unit and detach any attachments or accessories.
- Inspect the hose for any visible bed bugs or debris.
- Use a stiff brush or a toothbrush to gently scrub the inside of the hose, paying close attention to crevices and corners.
- Ensure that you reach every part of the hose by using a long, flexible brush or a plumbing snake.
- Rinse the hose thoroughly with warm water, ensuring that all traces of debris or bed bugs are removed.
- Leave the hose to dry completely before reattaching it to the vacuum cleaner.
Steps To Clean And Disinfect The Brush Roll For Effective Bed Bug Removal:
The brush roll of a bagless vacuum cleaner can accumulate bed bugs and debris over time. To maintain its effectiveness for bed bug removal, follow these steps to clean and disinfect the brush roll:
- Detach the brush roll from the vacuum cleaner according to the manufacturer’s instructions.
- Using a pair of scissors or a seam ripper, carefully cut away any tangled hair, thread, or fibers.
- Place the brush roll in a sink or basin filled with warm soapy water. Let it soak for a few minutes to loosen any debris.
- Scrub the brush roll using a brush (such as an old toothbrush) to remove any remaining debris.
- Rinse the brush roll thoroughly with warm water to ensure all soap residue and debris are removed.
- To disinfect the brush roll, soak it in a mixture of water and vinegar for approximately 15 minutes. Then, rinse it again with warm water.
- Allow the brush roll to air dry completely before reattaching it to the vacuum cleaner.
Cleaning the vacuum hose and brush roll of a bagless vacuum cleaner is an essential step in eliminating bed bugs and maintaining the performance of the appliance. By following these steps, you can ensure a thorough cleaning process and enhance the effectiveness of your vacuum cleaner in bed bug removal.
Regular Maintenance And Cleaning
Regular maintenance and cleaning of a bagless vacuum cleaner is essential in preventing and eliminating bed bugs. Follow these steps to ensure a thorough cleaning and keep your home free from these unwanted pests.
Highlighting The Importance Of Regular Vacuum Cleaner Maintenance
Regular maintenance and cleaning of your bagless vacuum cleaner are crucial for effective performance and ensuring it stays bed bug-free. Neglecting proper maintenance can lead to clogged filters, decreased suction power, and potential infestations. By following these simple steps, you can maintain your vacuum cleaner’s optimal functionality and eliminate the risk of bed bugs:
- Clean the dustbin: Emptying the dustbin after each use prevents the accumulation of debris and bed bugs. Follow these steps:
- Remove the dustbin from the vacuum cleaner.
- Dispose of the collected dirt and debris in a sealed bag to prevent bed bugs from escaping.
- Rinse the dustbin with mild soap and water, ensuring all residues are removed.
- Allow the dustbin to dry completely before reattaching it to the vacuum cleaner.
- Wash the filters: Cleaning and replacing filters regularly not only enhance your vacuum cleaner’s performance but also prevent bed bug contamination. Consider the following:
- Check the manufacturer’s instructions for guidance on how often to clean or replace the filters.
- If washable, remove the filters and rinse them gently under cold water.
- Allow the filters to air dry completely before reinstalling them.
- If non-washable, carefully remove and replace them according to the manufacturer’s recommendations.
- Inspect the brush roll: The brush roll can accumulate hair, debris, and even bed bugs over time. To maintain its effectiveness:
- Detach the brush roll from the vacuum cleaner, following the manufacturer’s instructions.
- Remove any entangled hair or debris using scissors or a suitable tool.
- Rinse the brush roll with water, ensuring all residue is eliminated.
- Allow the brush roll to dry completely before reattaching it.
- Clean the hose and attachments: Bed bugs can easily find their way into the vacuum cleaner’s hoses and attachments. To minimize this risk:
- Disconnect the hose and attachments from the main unit.
- Inspect them for any visible dirt, debris, or bed bugs.
- Wipe the surfaces with a damp cloth or rinse them if necessary.
- Ensure all components are completely dry before reattaching them to the vacuum cleaner.
- Lubricate moving parts: Lubricating the movable parts of your vacuum cleaner can significantly prolong its lifespan and maintain its efficiency. Follow these steps:
- Identify the manufacturer’s recommended lubricant for your specific model.
- Apply a small amount of lubricant to the designated parts, such as wheels and rotating brushes.
- Wipe off any excess lubricant and ensure the parts move smoothly.
By adhering to these maintenance practices, you can keep your bagless vacuum cleaner in excellent condition and protect your home from bed bug infestations. Regular cleaning not only improves the longevity of your vacuum cleaner but also ensures optimal performance when eliminating bed bugs and keeping your living space clean and healthy.
Storage And Protection
Keep your bagless vacuum cleaner free from bed bugs with these simple cleaning tips. Remove and clean the dust container, filter and attachments regularly to ensure effective storage and protection against pests.
When it comes to storing your bagless vacuum cleaner and protecting it from bed bugs, there are a few techniques you can follow to ensure its safety. By implementing proper storage methods and taking precautions, you can minimize the risk of infestation and maintain the cleanliness of your vacuum.
Proper Storage Techniques To Prevent Bed Bugs From Infesting The Vacuum Cleaner
- Empty the dirt canister: Before storing your bagless vacuum cleaner, make sure to empty the dirt canister completely. This will prevent any debris or insects, including bed bugs, from lingering inside the vacuum and potentially infesting it.
- Clean the filters: Remove and clean the filters according to the manufacturer’s instructions. Dirty filters can attract pests and compromise the vacuum’s efficiency. Regular maintenance is essential to ensure the longevity of your appliance.
- Store in a sealed bag or container: To provide an extra layer of protection, consider storing your bagless vacuum cleaner in a sealed bag or container. This will prevent any external pests, such as bed bugs, from accessing and inhabiting the appliance.
- Store in a cool and dry place: Choose a storage area that is cool, dry, and away from humidity. Moisture can promote the growth of mold and attract pests. Optimal storage conditions will help maintain the cleanliness and functionality of your vacuum.
Tips For Protecting The Vacuum Cleaner When Not In Use
- Use a vacuum cleaner cover: Investing in a vacuum cleaner cover can significantly reduce the risk of infestation. These covers are specifically designed to fit over the appliance and protect it from dust, insects, and other contaminants.
- Regularly inspect the storage area: Conduct routine inspections of the storage area to identify any signs of pest infestation. Look out for droppings, eggs, or live bugs that may have found their way into the vicinity of your vacuum cleaner.
- Keep the vacuum away from potential sources of infestation: Avoid storing your vacuum cleaner near areas that are prone to bed bug infestations, such as beds, couches, or other upholstered furniture. Bed bugs can easily transfer from these areas to your vacuum.
- Vacuum regularly: Even when your vacuum cleaner is not in use for an extended period, it is essential to run it occasionally. Operating the vacuum will help keep the internal components active and discourage pests from taking up residence inside.
By implementing these storage and protection techniques, you can maintain the cleanliness and effectiveness of your bagless vacuum cleaner while reducing the risk of bed bug infestations. Remember to follow the manufacturer’s instructions for proper maintenance and storage to ensure the longevity of your appliance.
Bed Bug Prevention In The Surrounding Area
Prevent bed bugs in your surrounding area by properly cleaning your bagless vacuum cleaner. Remove and dispose of the bagless canister contents in a sealed bag, wipe down the interior with a damp cloth, and vacuum outside areas to ensure a thorough clean.
When it comes to preventing bed bugs from infesting the environment around your bagless vacuum cleaner, there are some simple steps you can take. By following these tips, you can reduce the risk of a bed bug infestation in the surrounding area and ensure the cleanliness of your living space.
Tips For Preventing Bed Bugs From Infesting The Vacuum Cleaner’S Environment:
- Keep the area around the vacuum cleaner clean and clutter-free: A cluttered environment provides hiding places for bed bugs, making it easier for them to infest your surroundings. Regularly clean and declutter the area around your vacuum cleaner to minimize the risk of bed bug infestation.
- Vacuum frequently: Regularly vacuuming your living space helps to remove any potential bed bug eggs or nymphs. Pay special attention to areas where bed bugs are more likely to hide, such as mattress seams, furniture seams, and carpet edges.
- Inspect and clean your vacuum cleaner regularly: Bed bugs can hide in the filters, brushes, or canister of your vacuum cleaner. Take the time to inspect and clean these components regularly to prevent the infestation from spreading.
- Use a vacuum cleaner with a HEPA filter: Bed bugs are tiny creatures that can easily be carried away by the airflow of a vacuum cleaner. Using a vacuum cleaner equipped with a HEPA filter helps to capture bed bugs and their eggs, reducing the risk of them escaping back into your living space.
- Seal and discard vacuum cleaner bags: If your bagless vacuum cleaner uses disposable bags, make sure to seal and discard them properly after each use. This prevents bed bugs from escaping and reinfesting your environment.
By following these simple tips, you can maintain a clean and bed bug-free environment around your bagless vacuum cleaner. Regular cleaning, decluttering, and proper maintenance of your vacuum cleaner are key in preventing the spread of bed bugs and ensuring the cleanliness of your living space.
Frequently Asked Questions Of How To Clean A Bagless Vacuum Cleaner Bed Bugs
Can Bed Bugs Infest Bagless Vacuum Cleaners?
Yes, bed bugs can infest bagless vacuum cleaners if they make their way into the machine. It is important to clean and maintain your vacuum regularly to prevent bed bug infestations.
How Often Should I Clean My Bagless Vacuum Cleaner To Prevent Bed Bugs?
To prevent bed bugs, it is recommended to clean your bagless vacuum cleaner after each use. Empty the dust bin, remove any debris, and wipe down the surfaces with disinfectant. Additionally, regular deep cleaning sessions should be done to thoroughly sanitize the cleaner.
How Can I Clean My Bagless Vacuum Cleaner To Get Rid Of Bed Bugs?
To clean a bagless vacuum cleaner for bed bugs, first, empty and clean the dust bin. Then, remove and clean all removable parts. Next, wipe down the entire machine with a disinfectant. Finally, vacuum any remaining bed bugs with a high-suction vacuum attachment.
Conclusion
To effectively clean a bagless vacuum cleaner for bed bugs, it’s important to follow the right steps and precautions. By regularly emptying and washing the dustbin, cleaning the filters, and disinfecting the vacuum head, you can ensure a thorough removal of bed bugs and their eggs.
Using a steam cleaner is also a great way to get rid of these pests, as the heat kills them effectively. Remember, prevention is better than cure, so it’s crucial to regularly inspect your vacuum cleaner for any signs of infestation and take immediate action.
Implementing these cleaning practices will not only keep your home free from bed bugs, but also improve the lifespan and efficiency of your vacuum cleaner. So, don’t wait any longer, start cleaning your bagless vacuum cleaner today and say goodbye to bed bugs for good!