

To install a Zephyr Range Hood, first, locate the installation manual for the specific model. Follow the instructions step by step for a successful installation process.
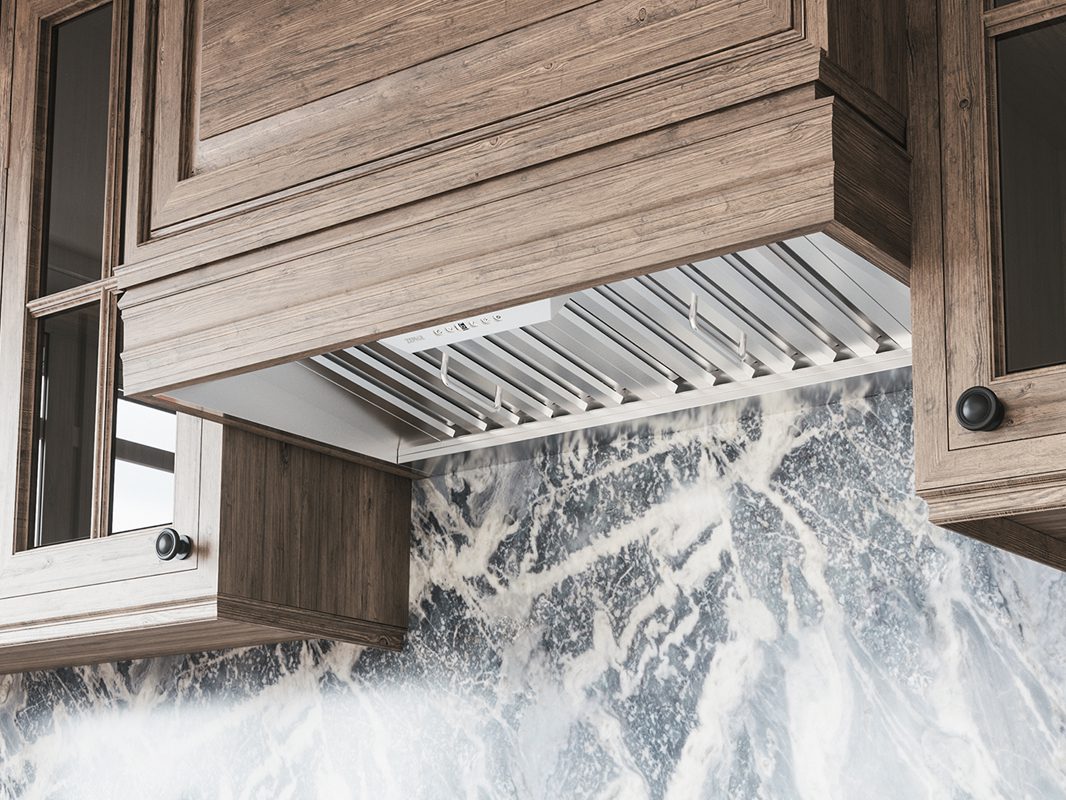
Zephyr Range Hoods are designed to efficiently ventilate and remove cooking odors from your kitchen, ensuring a fresh and clean environment. With a wide range of options available, choosing the right model for your kitchen’s needs is crucial. In addition to removing smoke and odors, Zephyr Range Hoods are also known for their stylish designs that can enhance the overall aesthetic of your kitchen.
In this guide, we will explore the steps required to install a Zephyr Range Hood, providing you with a clear understanding of the installation process and helping you achieve a functional and visually appealing kitchen space. So, let’s dive in and get started on installing your Zephyr Range Hood correctly.
1. Overview And Benefits Of Zephyr Range Hood
With its enhanced air filtration system, the Zephyr Range Hood ensures that your kitchen remains fresh and clean. Its stylish and modern design adds a touch of elegance to any kitchen décor. The Zephyr Range Hood is not only a beautiful addition to your home, but it also improves ventilation in your kitchen, effectively removing smoke, odors, and airborne grease.
The advanced air filtration system of the Zephyr Range Hood eliminates up to 99% of harmful contaminants, making it the ideal choice for homeowners concerned about air quality. Experience the difference in air circulation and overall freshness that the Zephyr Range Hood provides.
Upgrade your kitchen with this innovative and efficient range hood today.
1.1 Why Choose Zephyr Range Hood?
Zephyr Range Hood is the perfect choice for your kitchen. It delivers superior performance and durability, ensuring long-lasting use. This range hood is energy-efficient, helping you save on electricity bills while being eco-friendly. Installing it is a breeze, and maintenance is a piece of cake.
With its user-friendly design, you can have it set up in no time. The sleek and stylish appearance of Zephyr Range Hood adds a touch of elegance to your kitchen, making it a standout feature. Say goodbye to smoke, odors, and fumes with its powerful ventilation system.
Experience the convenience and efficiency of cooking with Zephyr Range Hood, the ultimate companion for any kitchen.
2. Preparing For Installation
Before installation, make sure you gather all the necessary tools and materials. Measure and evaluate the ventilation requirements to ensure proper functionality. Having the right equipment and understanding the space will make the installation process smoother. Keep in mind the size and layout of your kitchen, as well as any specific instructions provided by the manufacturer.
By preparing in advance, you can save time and avoid any potential issues that may arise during installation. Follow these steps to ensure a successful and hassle-free installation of your Zephyr Range Hood. With proper preparation, you’ll be able to enjoy the benefits of a well-ventilated kitchen in no time.
2.1 Determining The Proper Location
Determining the proper location for installing your Zephyr range hood is crucial. Take into consideration your kitchen layout and design to ensure a seamless integration. Also, make sure to allow for proper clearance above the cooking surface. Following these guidelines will help you achieve optimal functionality and aesthetics for your range hood installation.
2.2 Checking Electrical And Ventilation Connections
When installing a Zephyr range hood, it is crucial to assess the existing electrical and ventilation connections. Check the wiring and outlets to ensure compatibility with the ventilation system. Make sure the electrical connections can support the range hood’s power requirements.
Verify that the ventilation system is properly in place and functioning effectively. This step is essential to ensure the safe and efficient operation of your Zephyr range hood. Before proceeding with the installation, double-check the electrical and ventilation connections to prevent any potential issues in the future.
Taking the time to assess and address these connections will help ensure a successful installation and optimal performance of your Zephyr range hood.
3. Step-By-Step Installation Guide
Before installing the Zephyr Range Hood, it is important to unpack and inspect it thoroughly. Make sure there are no damages or missing parts. Once you have checked everything, you can proceed with mounting and securing the hood. Follow the manufacturer’s instructions and use the provided screws and brackets to attach the hood to the desired location.
Ensure that the hood is level and properly aligned before tightening the screws. It is recommended to have someone assist you with holding the hood in place while you secure it. Double-check all the connections and ensure that everything is secure before testing the range hood.
By following these step-by-step instructions, you can successfully install your Zephyr Range Hood.
3.1 Mounting The Range Hood
To mount the Zephyr range hood, start by determining the correct height and position. Measure carefully to ensure a proper fit. Attach the hood securely to either the wall or cabinet, depending on your preference. Use sturdy screws or brackets for stability.
Make sure to follow the manufacturer’s instructions for your specific model. It’s important to have the range hood installed correctly to ensure optimal performance and safety in your kitchen. With a few simple steps, you can have your Zephyr range hood mounted and ready for use in no time.
3.2 Connecting The Electrical Wiring
To safely connect the Zephyr Range Hood to the power source, it is crucial to understand the electrical requirements. Make sure you follow these important guidelines. Begin by turning off the power supply to avoid any accidents. Next, identify the electrical box where the hood will be connected, ensuring it meets the necessary specifications.
Take note of the wire colors – typically, black for power, white for neutral, and green or copper for ground. Strip the wires, exposing about half an inch of copper, and remove any insulation. Connect the wires by twisting the corresponding colors together and securing them with wire nuts.
Finally, tuck the wiring into the electrical box and securely attach the cover. Always double-check your connections before restoring power to the hood. By following these steps, you can safely and effectively install your Zephyr Range Hood.
3.3 Installing The Ventilation Ductwork
Installing the ventilation ductwork for your Zephyr Range Hood requires selecting the appropriate ducting materials. It is crucial to properly route and secure the ductwork to ensure optimal performance and functionality. By carefully following the manufacturer’s instructions, you can choose the right materials that suit your installation needs.
Additionally, you should consider factors such as the length of the duct run, any bends or turns in the ductwork, and the type of wall or ceiling penetration required. This will help you determine the duct size and make appropriate adjustments.
Moreover, using high-quality clamps and fasteners, you can secure the ductwork in place and prevent any air leaks. Properly installed ventilation ductwork will ensure efficient air circulation and maintain a clean and healthy environment in your kitchen.
4. Testing And Adjusting The Range Hood
To test and adjust the Zephyr Range Hood, it’s vital to check for proper ventilation and operation. This ensures efficient performance. First, assess if the hood is extracting air adequately and removing cooking odors effectively. Make any necessary modifications to improve the ventilation system.
Next, test the control buttons and fan speeds to ensure smooth operation. Adjust the fan speed to find the ideal setting for your cooking needs. Additionally, check if the LED lights are working correctly, providing ample illumination over the cooking area.
Moreover, inspect the filters regularly, clean or replace them as needed to maintain optimal performance. By following these guidelines, you can ensure your Zephyr Range Hood is installed correctly and functioning at its best.
4.1 Verifying Airflow And Exhaust Efficiency
Verifying the airflow and exhaust efficiency of your Zephyr Range Hood is crucial. A smoke or airflow test can be performed to ensure optimal performance. By adjusting fan speed and controls, you can enhance the hood’s efficiency and effectiveness. This step is essential for eliminating cooking smoke, odors, and contaminants from your kitchen.
Furthermore, it contributes to a healthier indoor environment. With proper verification, you can enjoy a well-functioning Zephyr Range Hood that efficiently removes airborne pollutants. Keep your kitchen clean and fresh by following these simple steps. Install your Zephyr Range Hood with confidence, knowing that it will effectively ventilate your cooking space.
4.2 Noise Reduction And Maintenance Tips
Installing a Zephyr Range Hood is a straightforward process that can greatly enhance your kitchen’s functionality and aesthetics. When it comes to reducing noise and keeping your range hood in optimal condition, there are a few key tips to keep in mind.
First, it is important to identify and address any excessive noise, as this can be a sign of an underlying issue. Regular cleaning and maintenance are also crucial to ensure that the range hood operates efficiently and quietly. By regularly cleaning the filters and accessing the fan assembly for cleaning, you can prevent excessive noise caused by dirt and debris buildup.
Additionally, inspecting and tightening any loose parts can significantly reduce noise. Following these noise reduction and maintenance tips will help you enjoy a quiet, efficient, and properly functioning Zephyr Range Hood.
5. Troubleshooting Common Issues
The first step in troubleshooting a range hood that is not working or powering on is to check the power source. Ensure that the hood is properly plugged in and that the circuit breaker is not tripped. Next, inspect the wiring connections to make sure they are secure and not damaged.
If the power supply is not the issue, it is possible that the motor has burned out or the control board is malfunctioning. In this case, it may be necessary to replace these components. Excessive noise or vibration from the hood can be caused by loose or damaged parts.
Check and tighten any loose screws or bolts, and inspect the fan blade for any damage. If the noise persists, it may be necessary to replace the fan motor. Regular maintenance and cleaning of the range hood can also help prevent these common issues from occurring.
5.1 Diy Solutions For Common Problems
Installing a Zephyr Range Hood can be a DIY project with simple solutions for common issues. First, check the electrical connections and ensure a proper power supply. Next, adjust the fan blades and motor for optimal performance.
5.2 Seeking Professional Assistance
Seeking professional assistance for installing your Zephyr range hood is essential to ensure proper installation. Zephyr, as a reputable brand, provides excellent customer support for any queries and concerns you may have. It is recommended to contact Zephyr customer support when facing technical difficulties or if you have any questions regarding the installation process.
Additionally, they can help you find authorized service technicians in your area who are trained to handle Zephyr products. Their expertise will guarantee a seamless installation process, ensuring optimal performance of your range hood. By reaching out to Zephyr customer support, you can rely on their knowledge and experience to guide you through any installation challenges you may encounter.
Don’t hesitate to contact them for expert assistance.
Credit: homesclubs.com
Frequently Asked Questions Of How To Install Zephyr Range Hood
How Do I Install A Zephyr Range Hood?
To install a Zephyr Range Hood, first, choose the right location for installation. Afterwards, assemble the hood and secure it to the wall or under the cabinet. Connect the wiring and ductwork, then test the ventilation and lights to ensure everything is working properly.
Finally, consult the user manual for any additional instructions.
What Tools Do I Need To Install A Zephyr Range Hood?
To install a Zephyr Range Hood, you’ll need a few tools including a drill, screwdriver, measuring tape, level, wire cutters, duct tape, and adjustable wrench. Make sure you have these tools on hand before you start the installation process.
Can I Install A Zephyr Range Hood Without Professional Help?
Yes, you can install a Zephyr Range Hood without professional help. With some basic DIY skills and following the user manual instructions carefully, you can successfully install the range hood on your own. However, if you’re unsure or uncomfortable with the process, it’s always recommended to seek professional assistance for installation.
Conclusion
Installing a Zephyr Range Hood is a straightforward process that can greatly enhance your kitchen’s functionality and aesthetics. By following the steps outlined in this blog post, you can successfully install a Zephyr Range Hood in no time. First, make sure to gather all the necessary tools and materials.
Then, carefully measure and mark the desired location for the range hood. Next, assemble the hood and attach it securely to the wall or cabinet. Lastly, connect the ductwork and power supply, ensuring proper ventilation and functionality. With its powerful suction and sleek design, the Zephyr Range Hood will effectively eliminate cooking odors and enhance your kitchen’s overall atmosphere.
With these simple instructions, you can confidently install your Zephyr Range Hood and enjoy a clean and stylish kitchen space.